반응형


6월 업데이트에 삼성 기본 시계앱 알람에서 쓰이는 "공휴일 제외" 기능이 SmartThings에 도입되었습니다.


아주 반가운 소식이였습니다.


Rules API 문서에도 enum이 추가되었죠


https://developer.smartthings.com/docs/api/public#tag/Rules/operation/createRule

API | Developer Documentation | SmartThings

SmartThings Public API

developer.smartthings.com

actions -> if -> equals -> left던 righte 던 같음 -> date -> reference에 가보면 Holiday가 있는것을 볼 수 있습니다.
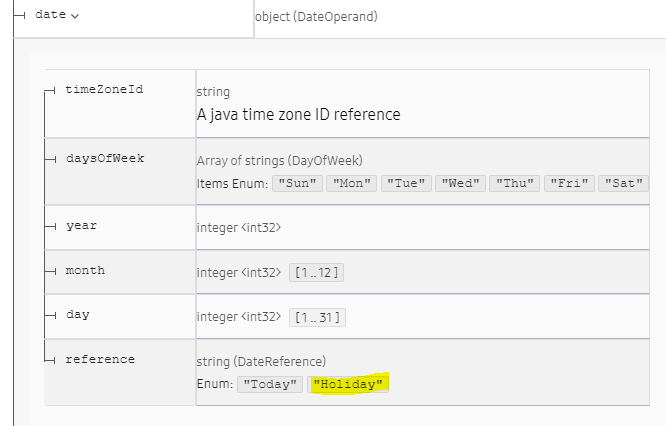
 

앱에선 공휴일 제외로만 쓸수있습니다.

현재 공휴일 제외로 만들면 룰이 cloud룰로만 만들수 있습니다.


그래서!!!

공휴일에도 조건으로 쓰고? 아닐때도 조건으로 쓸수있으면서 로컬룰로도 만들수있는

공휴일 스위치를 만들어보았습니다.


1. 준비물은

로컬 가상 스위치 만들기

- 안드로이드는 실험실에서 허브지정해서 만들기

- iOS는 https://cli.weekendproject.net/virtual/ 를 통해서 또는 https://my.smartthings.com/advanced/devices

에서 Switch를 생성하면됩니다.
 

가상스위치 생성방법들에 대한건 이건 따로 게시물이 있어서 링크걸면 좋겠네요 추후 시간나면 만들어볼게요 ㅠㅠ

이미 링크있으면 알려주시면 감사하겠습니다.


여튼 가상스위치를 하나 만들고!!

해당 스위치의 deviceId를 https://my.smartthings.com/advanced/devices 에서 복사해옵니다.

https://my.smartthings.com/advanced/rules 로 이동해서 + Add a new Rule을 클릭합니다.

상세 방법은 https://cafe.naver.com/dothesmartthings/27 여기를 참고해주세요


간단히 룰을 설명하면 아래와 같습니다.

매일 00:01에

오늘이 공휴일이면 ->공휴일 가상스위치 ON

오늘이 공휴일이 아니면 -> 공휴일 가상스위치 OFF


복사한 deviceID를 아래 {{공휴일가상스위치 DeviceID}} 대신에 "deviceId" 를 넣어서 생성하시면 됩니다.

[
  {
    "every": {
      "specific": {
        "reference": "Midnight",
        "offset": {
          "value": {
            "integer": 1
          },
          "unit": "Minute"
        }
      },
      "actions": [
        {
          "if": {
            "equals": {
              "left": {
                "date": {
                  "reference": "Today"
                }
              },
              "right": {
                "date": {
                  "reference": "Holiday"
                }
              }
            },
            "then": [
              {
                "command": {
                  "devices": [
                    {{공휴일가상스위치 DeviceID}}
                  ],
                  "commands": [
                    {
                      "component": "main",
                      "capability": "switch",
                      "command": "on"
                    }
                  ]
                }
              }
            ],
            "else": [
              {
                "command": {
                  "devices": [
                    {{공휴일가상스위치 DeviceID}}
                  ],
                  "commands": [
                    {
                      "component": "main",
                      "capability": "switch",
                      "command": "off"
                    }
                  ]
                }
              }
            ]
          }
        }
      ]
    }
  }
]
 

자정 +1분을 한 이유는... 자정에 혹시 안될까바 ㅎㅎ 1분 추가를 했어요


이제 이렇게 가상스위치를 만들어두고 앱에서 제외뿐만 아니라 공휴일일때도 조건으로 활용 할 수 있겠죠?


문의사항은 https://cafe.naver.com/dothesmartthings/270 여기 댓글로 주세요!


반응형
반응형


https://cli.weekendproject.net

WEB CLI도 기본은 다갖추게되었으니

WEB CLI를 이용한 팁을 하나씩 올려보려고 합니다.


오늘의 예제는

테슬라에서 가장 많은 command를 쓰는 Sentry mode를 Capability로 만들어 보겠습니다

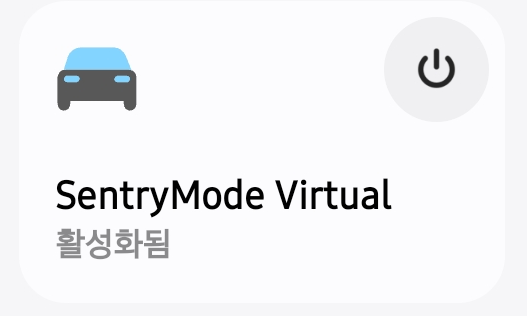
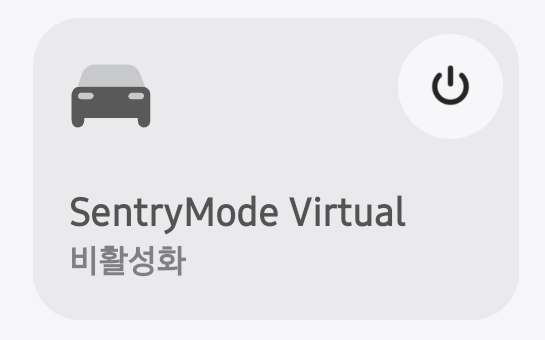
Sentry mode는 테슬라에서 감시모드 켜기 끄기입니다. 아래의 기기를 만들어보겠습니다


Switch랑 똑같습니다. 다만 보이는 글씨가 달라야겠죠???


1. Capability 만들기

우선 Web cli로 이동합니다

https://cli.weekendproject.net/capability/


Standard Capabilities drop box를 누르면 switch의 schema를 볼수있습니다.

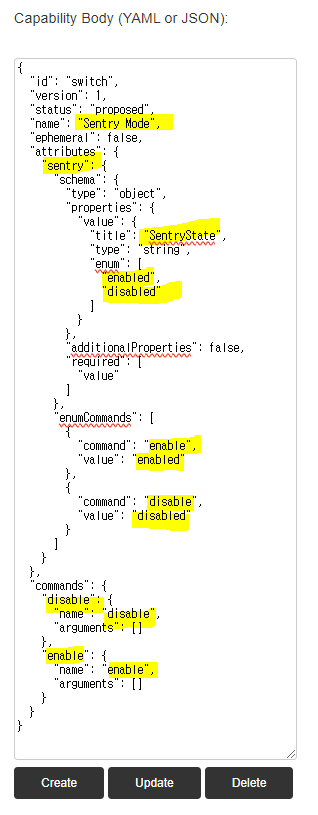
여기서 swith에 해당하는 부분을 Sentry mode로 바꾸고 attribute도 바꿉니다


오른쪽 처럼 바꿨습니다. 

노란색 음영처리한것처럼요 참쉽죠?

id : swtich를 빼고 생성합니다

아 !! 그리고 팁하나 드리면

name 과 capabilityId의 규칙


띄어쓰기 기준으로 대소문자가 결정되요

첫글짜는 무조건 소문자 띄어쓰기 다음부터 대문자

Sentry Mode 라고 하면 capability는 sentryMode

SentryMode 라고 하면 capability는  sentrymode 


 이렇게 되니 참고하세요 저는 standard 규칙에 맞게 Sentry Mode로 생성해보았습니다


그리고 Create!!!

참고로  id: Switch는 안지워도 무시되요^^

결과는 아래 나오고 


이렇게 생성되었습니다.

id는 namespace.CapabiltityId로 생성됩니다.  namespace는 랜덤이지만 자기꺼는 계속 동일합니다.

{
  "id": "samplecircle50208.sentryMode",
  "version": 1,
  "status": "proposed",
  "name": "Sentry Mode",
  "ephemeral": false,
  "attributes": {
    "sentry": {
      "schema": {
        "type": "object",
        "properties": {
          "value": {
            "title": "SentryState",
            "type": "string",
            "enum": [
              "enabled",
              "disabled"
            ]
          }
        },
        "additionalProperties": false,
        "required": [
          "value"
        ]
      },
      "enumCommands": [
        {
          "command": "enable",
          "value": "enabled"
        },
        {
          "command": "disable",
          "value": "disabled"
        }
      ]
    }
  },
  "commands": {
    "disable": {
      "name": "disable",
      "arguments": []
    },
    "enable": {
      "name": "enable",
      "arguments": []
    }
  }
}


2. Capability translation 만들기
 

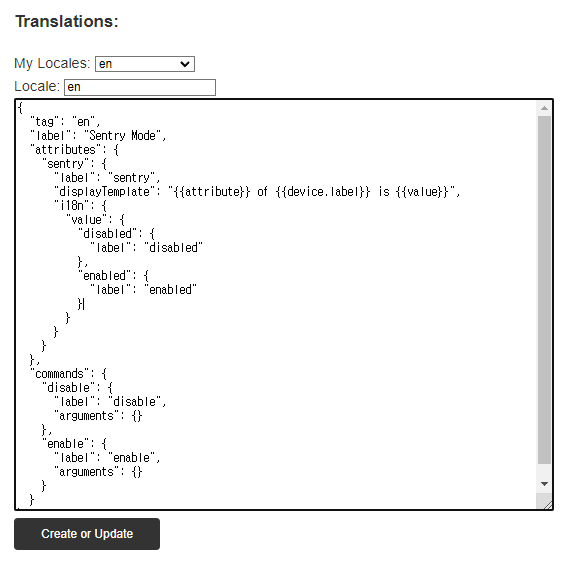
동일하게 아래 쪽에 Translations라고 있습니다

이건 꼭해주세요 command가 지금 안만들어지는 버그가있는데 수동으로  해줘야합니다

어떻게? 모르겠죠? 그럼 다시 switch를 조회해봅니다 ㅎㅎ

방법은 다시 위로 올라가서 Standard Capabilities에서 Switch 선택 -> Retrieve 클릭 -> Translations의 My locales에 en 클릭 

저부분을 복사해와서 제 입맛에 맞게 수정합니다!! 그리고 Create or Update 클릭

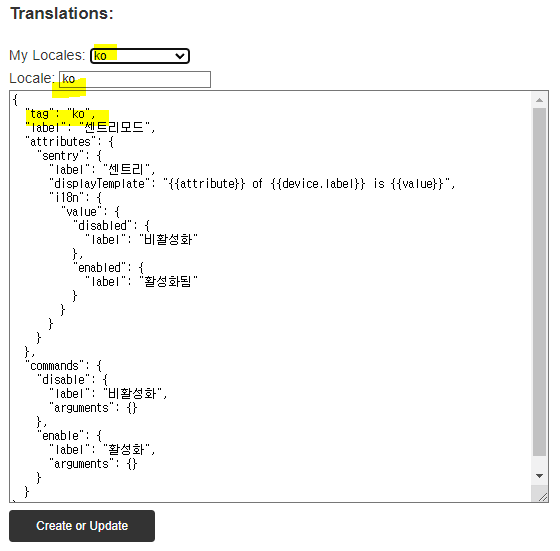
그리고 하는김에 한국어도!!! tag에 ko로 바꿔주시면됩니다.


참쉽죠? 이제 capability는 준비가 다끝났습니다


마지막 관문!!!


3. Capability presentation 만들기

이것은 세가지 섹션으로 나뉘어있습니다

dashboard - 첫 기기 카드에서 보일것에 대한 정의

detailview - 기기 카드를 클릭했을때 보이는것에 대한 정의

automation - automation에서 조건과 동작에 쓰일것들에 대한 정의


https://cli.weekendproject.net/capabilityPresentation/

여기로 이제 이동합니다

여기로 가면 My Capabilities를 클릭하면 방금 만든 나의 custom capability가 보일거에요 선택해줍니다


그럼 맨아래 Result에서 아래와 같은 문구가 나와요 없대요 presentation이 ㅠㅠ

"error":{"code":"4040000","message":"Capability Presentation is not found for id : samplecircle50208.sentryMode, version : 1","details":[]}


근데 어떻게? 나할줄모르는데 ㅠㅠ

Standard Capabilities가보이죠? 거기서 우리가 참고한 switch를 선택해줍니다!!!


또 열심히 제입맛에 맞게 Sentry모드랑 요것저것 수정을 합니다


근데 i18n저기뭔지 모르겠쬬?

저도 설명하기 어려우니 전 후를 보시고 터득하세요^^ ;;

본인하시다가 모르시면 답변드릴게요 저도 다아는건아니라 공부해서라도 알려드리겠습니다

switch sentryMode
{
  "dashboard": {
    "states": [
      {
        "label": "{{switch.value}}",
        "alternatives": [
          {
            "key": "on",
            "value": "{{i18n.attributes.switch.i18n.value.on.label}}",
            "type": "active"
          },
          {
            "key": "off",
            "value": "{{i18n.attributes.switch.i18n.value.off.label}}",
            "type": "inactive"
          }
        ]
      }
    ],
    "actions": [
      {
        "displayType": "standbyPowerSwitch",
        "standbyPowerSwitch": {
          "command": {
            "on": "on",
            "off": "off"
          },
          "state": {
            "value": "switch.value",
            "on": "on",
            "off": "off"
          }
        }
      }
    ],
    "panelItems": []
  },
  "detailView": [
    {
      "label": "{{i18n.label}}",
      "displayType": "standbyPowerSwitch",
      "standbyPowerSwitch": {
        "command": {
          "on": "on",
          "off": "off"
        },
        "state": {
          "value": "switch.value",
          "on": "on",
          "off": "off",
          "label": "{{switch.value}}",
          "alternatives": [
            {
              "key": "on",
              "value": "{{i18n.attributes.switch.i18n.value.on.label}}",
              "type": "active"
            },
            {
              "key": "off",
              "value": "{{i18n.attributes.switch.i18n.value.off.label}}",
              "type": "inactive"
            }
          ]
        }
      }
    }
  ],
  "automation": {
    "conditions": [
      {
        "label": "{{i18n.label}}",
        "displayType": "list",
        "list": {
          "alternatives": [
            {
              "key": "on",
              "value": "{{i18n.attributes.switch.i18n.value.on.label}}",
              "type": "active"
            },
            {
              "key": "off",
              "value": "{{i18n.attributes.switch.i18n.value.off.label}}",
              "type": "inactive"
            }
          ],
          "value": "switch.value",
          "multiSelectable": false
        },
        "emphasis": true
      }
    ],
    "actions": [
      {
        "label": "{{i18n.label}}",
        "displayType": "list",
        "list": {
          "alternatives": [
            {
              "key": "on",
              "value": "{{i18n.commands.on.label}}",
              "type": "active"
            },
            {
              "key": "off",
              "value": "{{i18n.commands.off.label}}",
              "type": "inactive"
            }
          ]
        },
        "emphasis": true
      }
    ]
  },
  "id": "switch",
  "version": 1
}
{
  "dashboard": {
    "states": [
      {
        "label": "{{sentry.value}}",
        "alternatives": [
          {
            "key": "enabled",
            "value": "{{i18n.attributes.sentry.i18n.value.enabled.label}}",
            "type": "active"
          },
          {
            "key": "disabled",
            "value": "{{i18n.attributes.sentry.i18n.value.disabled.label}}",
            "type": "inactive"
          }
        ]
      }
    ],
    "actions": [
      {
        "displayType": "standbyPowerSwitch",
        "standbyPowerSwitch": {
          "command": {
            "on": "enable",
            "off": "disable"
          },
          "state": {
            "value": "sentry.value",
            "valueType": "string",
            "on": "enabled",
            "off": "disabled"
          }
        }
      }
    ],
    "panelItems": []
  },
  "detailView": [
    {
      "label": "{{i18n.label}}",
      "displayType": "standbyPowerSwitch",
      "standbyPowerSwitch": {
        "command": {
          "on": "enable",
          "off": "disable"
        },
        "state": {
          "value": "sentry.value",
          "valueType": "string",
          "on": "enabled",
          "off": "disabled",
          "label": "{{sentry.value}}",
          "alternatives": [
            {
              "key": "enabled",
              "value": "{{i18n.attributes.sentry.i18n.value.enabled.label}}",
              "type": "active"
            },
            {
              "key": "disabled",
              "value": "{{i18n.attributes.sentry.i18n.value.disabled.label}}",
              "type": "inactive"
            }
          ]
        }
      }
    }
  ],
  "automation": {
    "conditions": [
      {
        "label": "{{i18n.label}}",
        "displayType": "list",
        "list": {
          "alternatives": [
            {
              "key": "enabled",
              "value": "{{i18n.attributes.sentry.i18n.value.enabled.label}}",
              "type": "active"
            },
            {
              "key": "disabled",
              "value": "{{i18n.attributes.sentry.i18n.value.disabled.label}}",
              "type": "inactive"
            }
          ],
          "value": "sentry.value",
          "valueType": "string",
          "multiSelectable": false
        },
        "emphasis": false
      }
    ],
    "actions": [
      {
        "label": "{{i18n.label}}",
        "displayType": "list",
        "list": {
          "alternatives": [
            {
              "key": "enable",
              "value": "{{i18n.commands.enable.label}}",
              "type": "active"
            },
            {
              "key": "disable",
              "value": "{{i18n.commands.disable.label}}",
              "type": "inactive"
            }
          ]
        },
        "emphasis": false
      }
    ]
  },
  "id": "samplecircle50208.sentryMode",
  "version": 1
}


이제 모든게 완성되었습니다


4. 확인 방법!!!

https://cli.weekendproject.net/virtual/

Virtual device로 이동합니다.

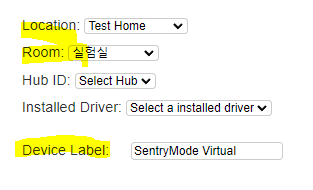
Location Room Device Label을 적으시고


저 밑에 밑에 Create by custom Profile로 가봅니다

형광팬 칠한걸 체크해주고 Category는 자기맘대로 하시고 저는 Car

그리고 복수로 체크해도되지만 SentryMode만 가지고있는 기기를 만들어보겠습니다

체크한 순서대로 Capability가 정의되니 참고해주세요


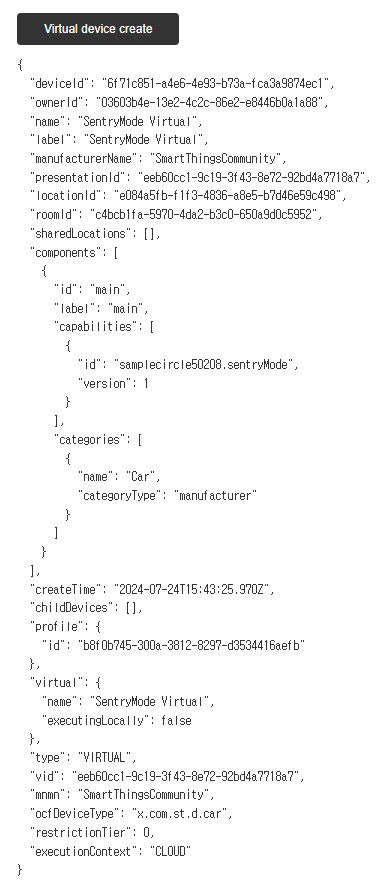
만들고 나면 아래와 같이 생성이 됩니다


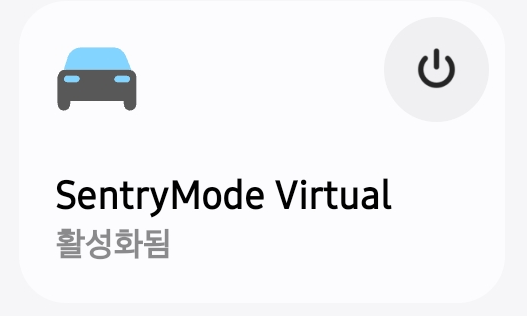
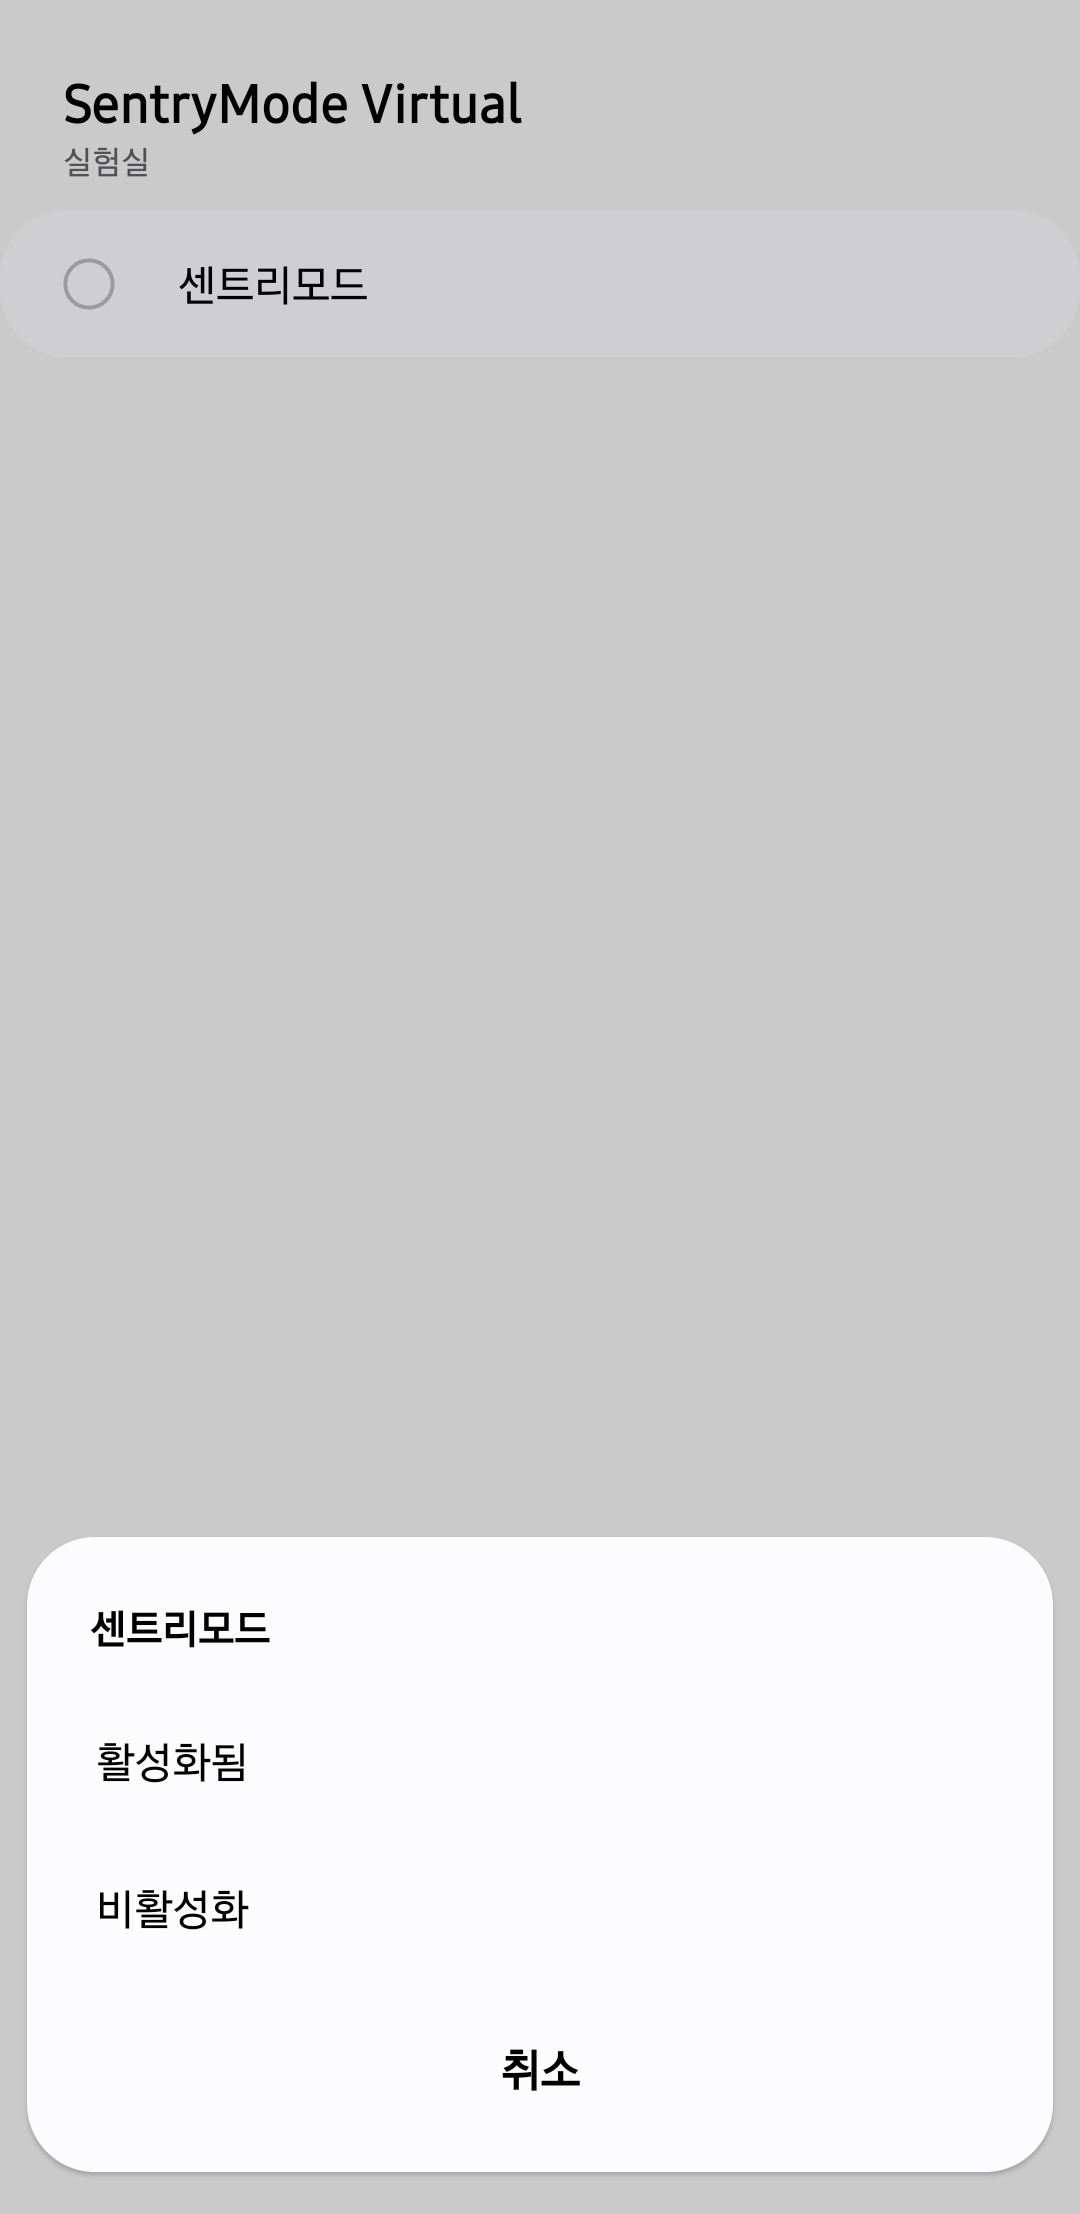
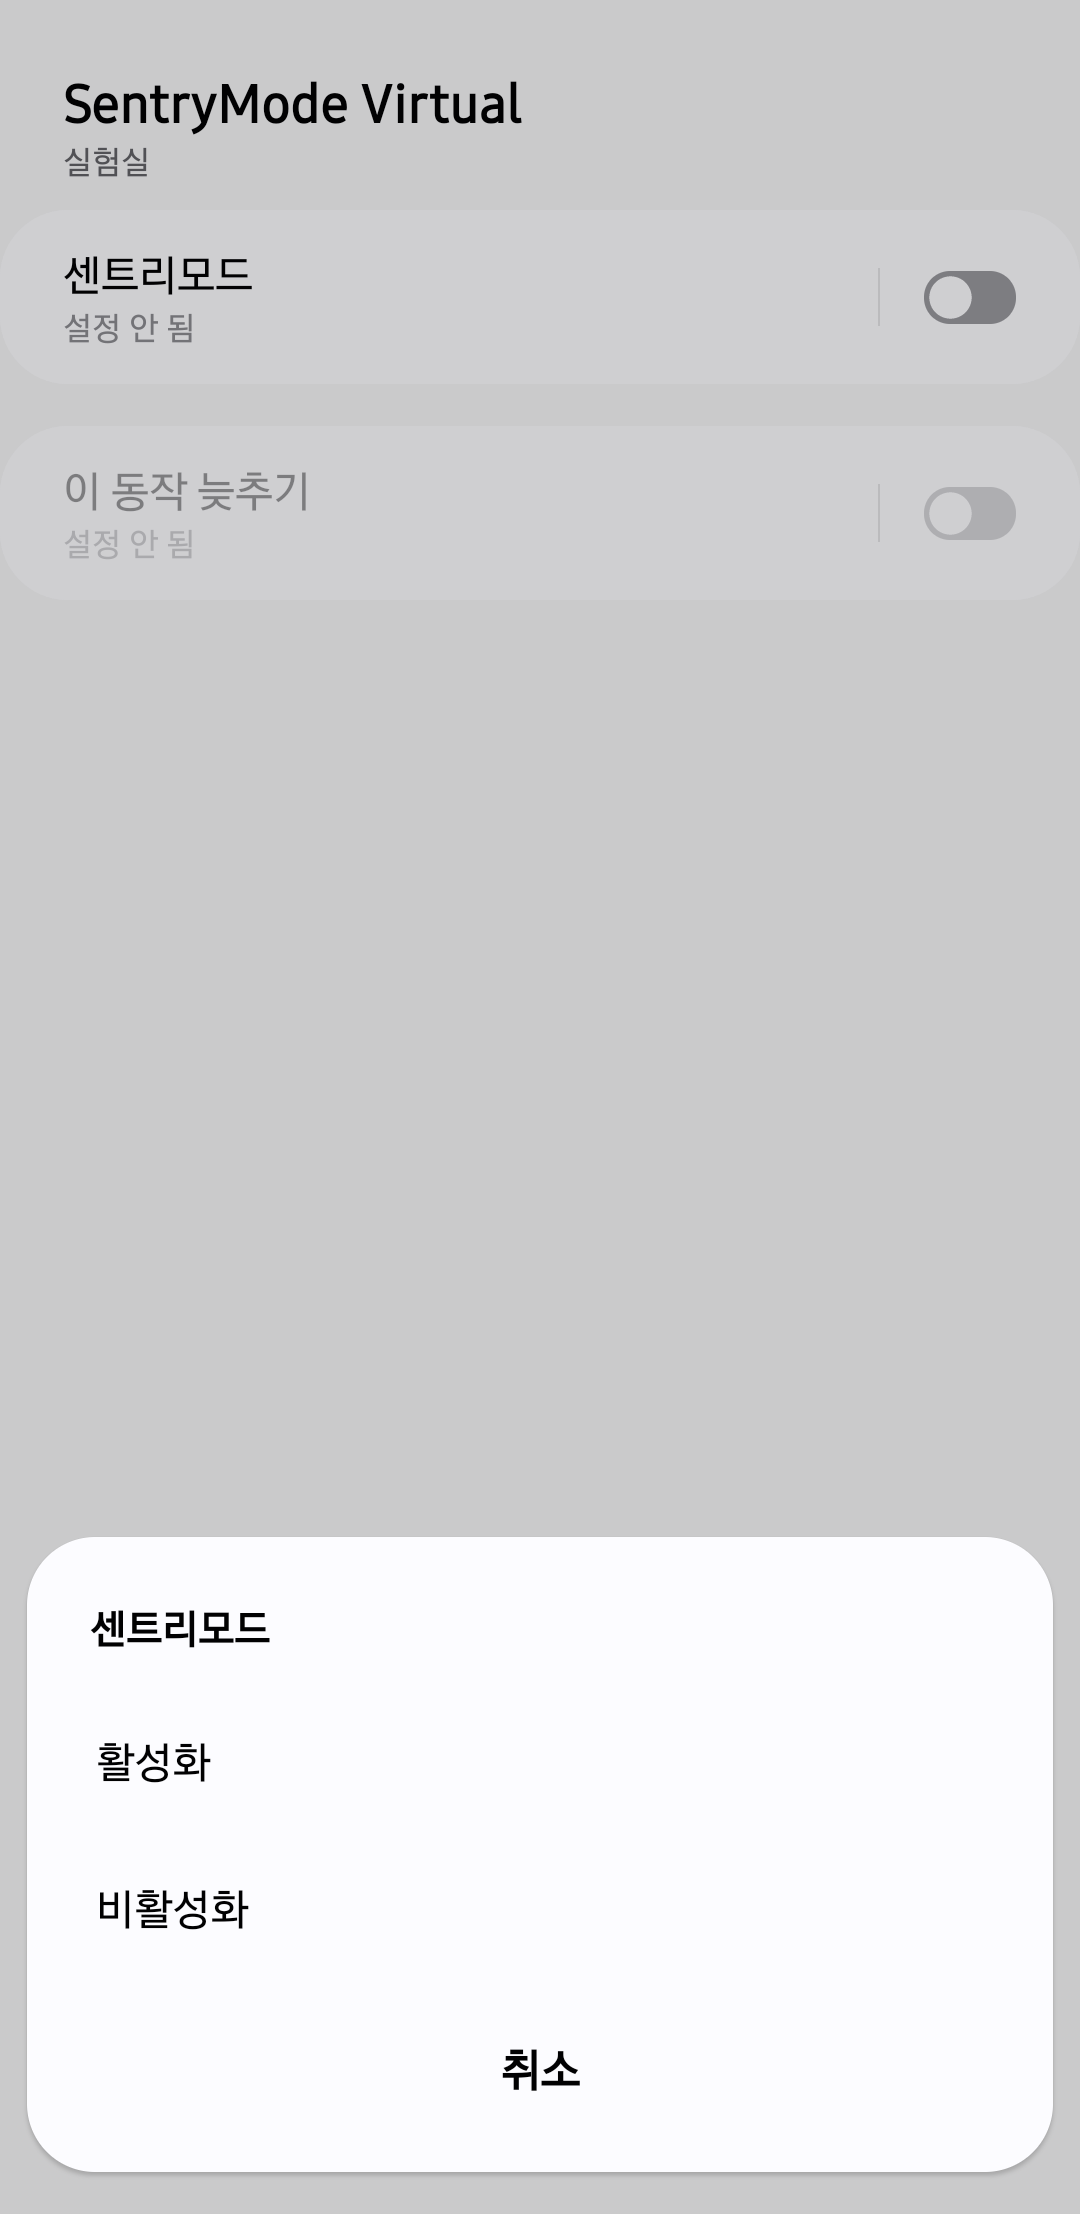
자앱으로 가볼까요? 잘생성되었습니다. command도 잘됩니다.


번역도 잘되고 자동화에서 조건 동작에도 원하는데로 잘 나오는것을 확인하실 수 있습니다.


피드백은 Do the SmartThings cape에 와서 주시면 더욱 감사하겠습니다!!

https://cafe.naver.com/dothesmartthings/193

반응형
반응형


https://youtube.com/shorts/5xBf2A_Ffl8?si=C9vo6gsfhaTspoht


방법은 카페에 공유했어요!!!

https://cafe.naver.com/dothesmartthings/37?tc=shared_link

아카라 큐브로 갤럭시 홈 미니 동요 재생하기

대한민국 모임의 시작, 네이버 카페

cafe.naver.com


반응형

+ Recent posts